
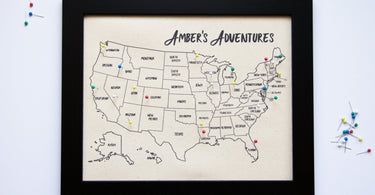
Ordering something custom can feel a little nerve wracking. Will it look right? Did I fill it out correctly? This guide walks through every step of personalizing a PennyBee Art push pin map, so you know exactly what to expect.
Step 1: Choose your map, size and frame
Start by picking your design, then select your size and frame finish on the product page. Most maps come in 11x14, 16x20 or 24x36, and mini maps come in 5x7 and 8x10. Frames come in Black, Honey, Gray, White and Blonde MDF wood, and many maps are also available unframed.
Step 2: Fill in the personalization fields
Below the size and frame options you will see a few fields. Here is what each one is for:
- Custom Map Title: the words printed at the top of your map. Use a family name, a couple's names, a date or a favorite phrase. Leave it blank and you will receive the title shown in the listing photos.
- Push Pins: choose your pin color, or pick "Other" to request a custom mix. Some maps, like our state park maps, have the pin choice built into the options above instead.
- Other Requests: anything extra, such as adding a location, changing a map color, adding a map key, or labeling a small country.
- Email: where we send your digital proof. Use an address you check often.
Some maps have their own fields. The LDS Missionary Map, for example, asks for the missionary's name, mission dates and flag.
Title examples to get you started
- The Johnson Family Adventures
- Sarah and Mike, Est. 2024
- Our National Park Adventures
- Adventure Awaits
- Elder Thompson, Brazil Recife Mission
Need more ideas? See our list of push pin map title and wording ideas.
Step 3: Approve your digital proof
After you order, we design your map and email a digital proof. Check the spelling, the dates and the layout. Reply with any changes, and we will send an updated proof. We print only after you approve it, so there are no surprises.
The one exception is ready to ship maps, which are printed exactly as shown and skip the proof step.
Step 4: We print, frame and ship your map
Once you approve, your map is printed on cotton or canvas, mounted on foam board and framed by hand. Framed maps arrive ready to hang, so you can start pinning right away.
Tips for a perfect map
- Double check names and dates in your proof, especially for gifts.
- Keep titles short. Two to six words usually look best.
- If you are unsure about wording, add a note in Other Requests. We are happy to suggest options.
- Ordering a gift? Use your own email for the proof so the surprise stays safe.
Still have questions? Visit our FAQ or contact us. Ready to start? Browse personalized push pin maps.
